Bicycle assembly instructions
Safe travels
Every bike we sell goes through assembly, adjustments, and checks performed by our professional mechanics. We do most of the work, but for packaging reasons, the bike you ordered from our webshop will need a final touch from you. But don’t worry, the task isn’t overwhelming, and with the instructions below, you can avoid mistakes. And if you’re unsure about any step, feel free to call us – we’re happy to help!
Pedals
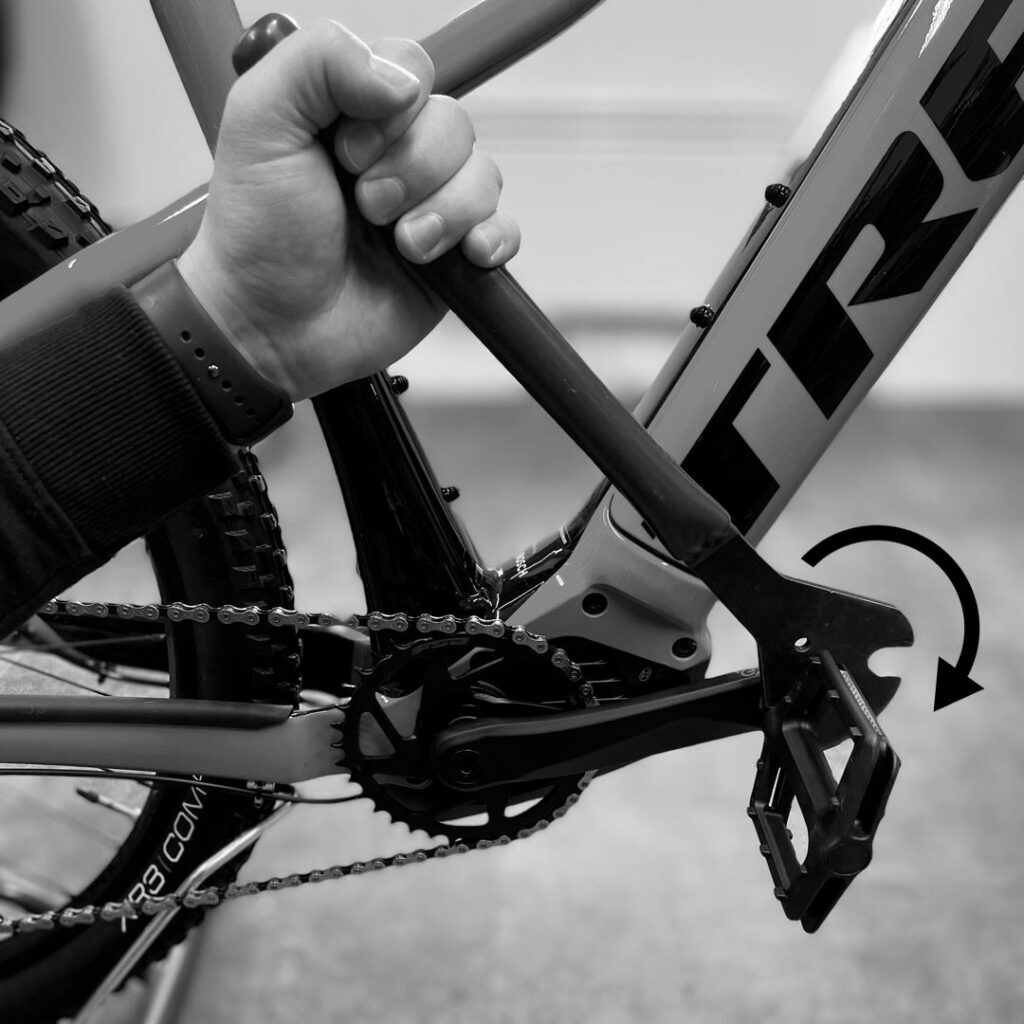
To install and tighten the pedals, you will need a pedal wrench or a 15 mm spanner.
Some pedal models are tightened with an Allen wrench (6 or 8 mm) through the hole in the pedal arm.
On the bike you ordered from our webshop, the pedals may be threaded “inward” into the pedal arms for delivery.
These should naturally be removed first and then installed correctly onto the pedal arms.
The instructions below show the tightening directions for both pedals.
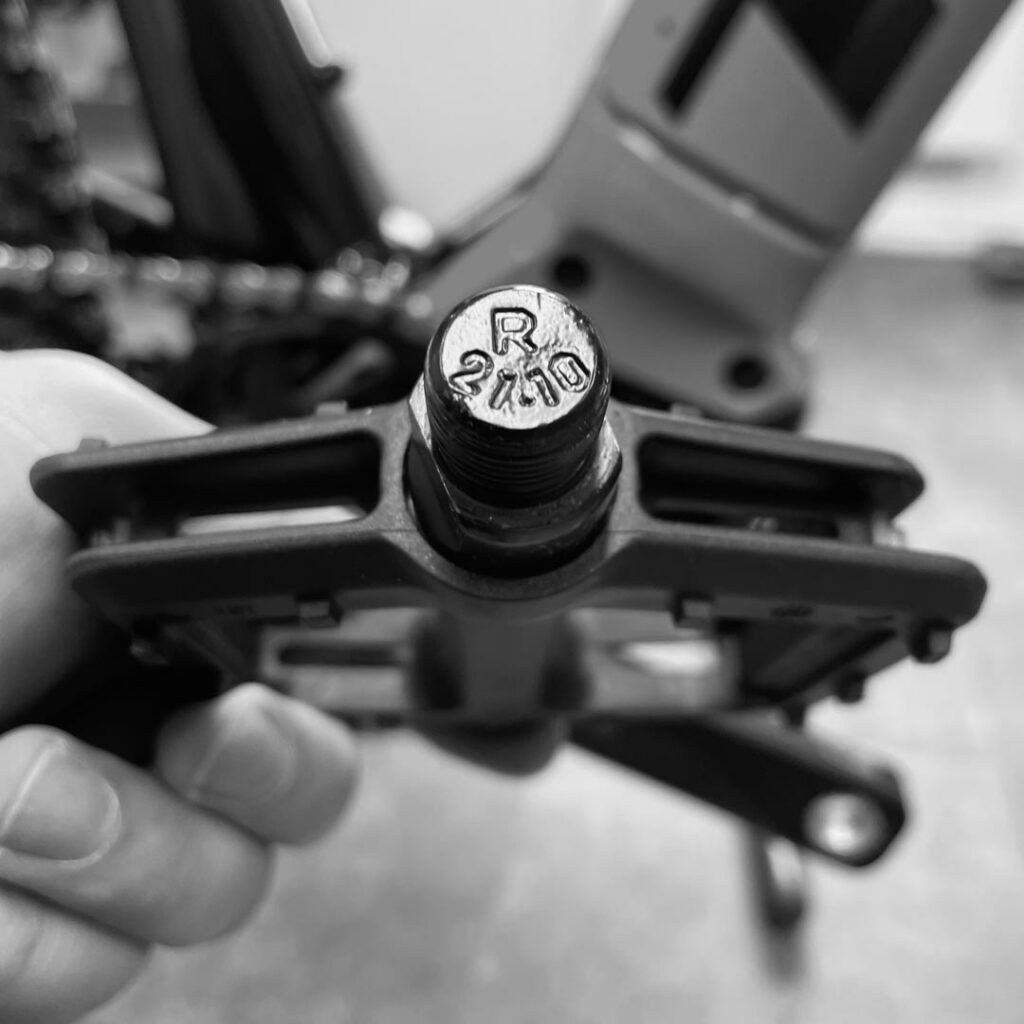
Bicycle pedals use different threading for the right and left sides. The side is usually marked on the pedal axle: R = “Right” (drive side) and L = “Left” (non-drive side).
The right pedal (drive side) has a ‘normal’ right-handed thread, so it tightens clockwise.
The left pedal (looking from the rear of the bike) has a so-called ‘left-handed’ thread. It tightens counterclockwise.
Note
The pedal axle should begin to rotate by hand without tools. If this doesn’t happen, check again that you are turning the pedal in the correct direction and that the pedal axle is not misaligned with the thread of the pedal arm.
A little grease can be added to the pedal axle during installation. This makes future removal of the pedal easier.
The pedals can be tightened quite firmly, as a pedal that comes loose during riding may cause a dangerous situation and injury risk. If a tightening torque is marked on the pedal arm or pedal, we recommend following it. Also, remember to check the pedal attachment at regular intervals!
Headset
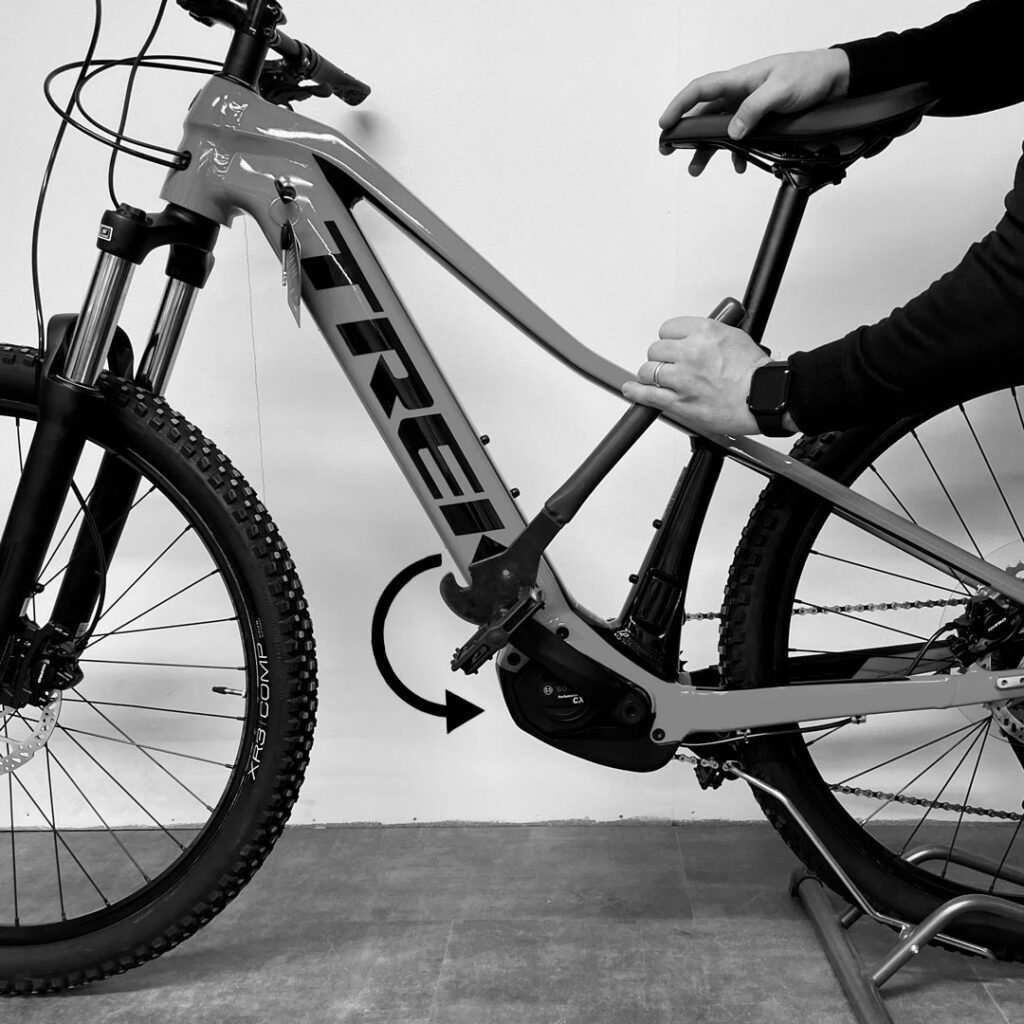
The headset is the part that connects the front fork’s steering tube to the handlebars. It is an important component, so be careful when tightening it. There are two basic types of headsets: the “aheadset” headset, which is tightened from the side, and the traditional headset that is tightened with a wedge. Different manufacturers may have specific integrated steering solutions, and in these cases, we recommend referring to the installation and user instructions provided by the manufacturer. The bike you ordered from our webshop will be delivered with the handlebars turned in the direction of the frame, and using the instructions below, you can rotate and tighten them into a safe riding position.
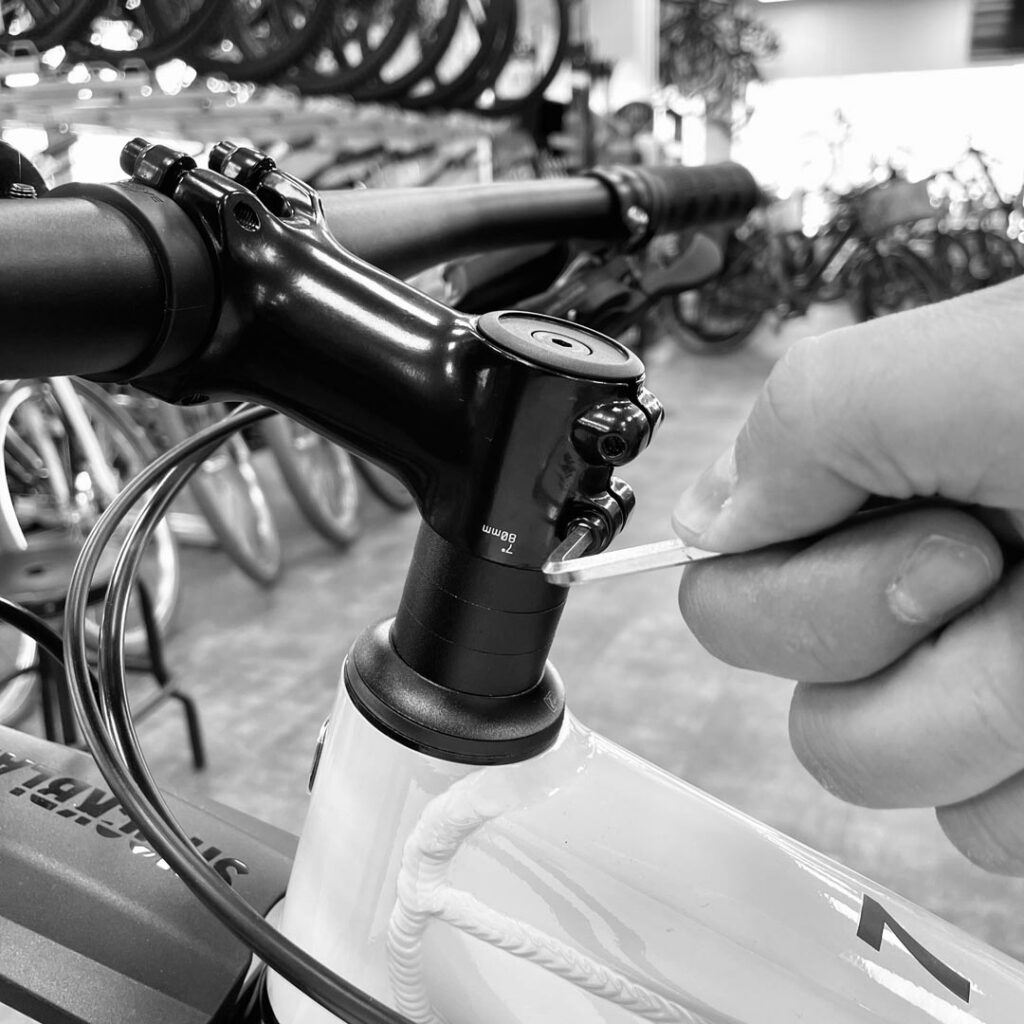
If your bike has a side-bolted stem (as in the picture) and the handlebar is turned to the side, start by loosening the bolts on the sides of the stem slightly. For this, you will usually need a 4 mm hex key (5 mm in some cases).
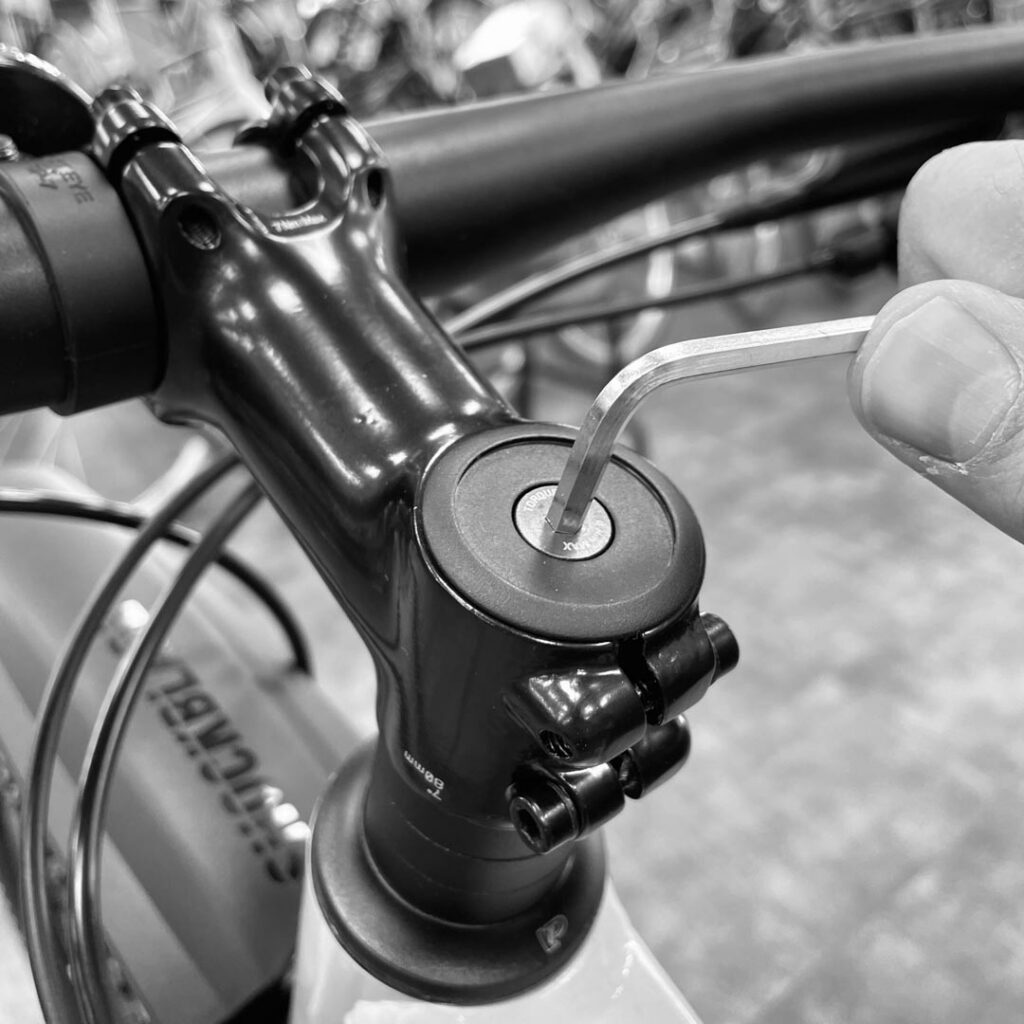
Once you have loosened the bolts on the sides of the stem, the handlebar should turn to the center effortlessly. Next, check that there is no play in the headset. This is done by turning the headset top cap bolt clockwise. The bolt doesn’t need to be tightened very hard, just enough to eliminate play. Hold the front brake down and rock the bike back and forth feeling for any play. If there is no play, you can now tighten the bolts on the sides of the stem to the torque specified on the stem.

Once you have tightened the stem in place, lift the front of the bike into the air and check that the steering moves smoothly. If the steering is notchy or feels sticky, the headset might be too tight. In that case, you need to loosen the stem’s attachment screws and slightly open the top cap bolt. Remember to tighten the stem attachment screws after adjustment!
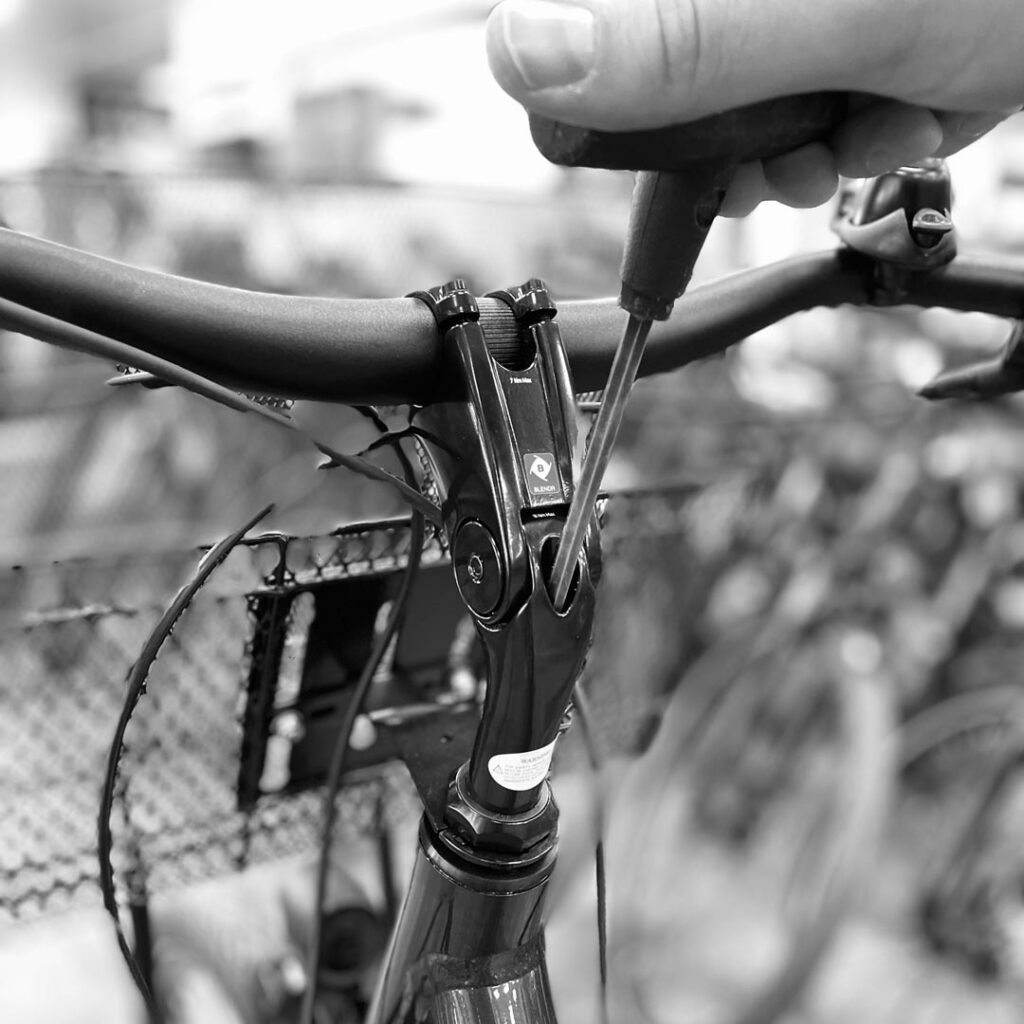
Wedge-Bolted Stem
If your bike has a wedge-bolted stem (as pictured) and you need to straighten the handlebar, it is easy. First, remove any rubber cover from the top of the tightening bolt. Then, you will need a long (often) 6 mm hex key. Slightly loosen the bolt by turning it counterclockwise, straighten the handlebar, and tighten the bolt. Ensure the tightening by standing with the front wheel between your legs and rocking the handlebar side to side. The handlebar should not turn.
Tip: While loosening the wedge-bolted stem bolt, do not turn it all the way off. The stem’s wedge can drop to the bottom of the fork steerer tube and cause extra work.
Tip 2: A common misconception is that the large nuts at the base of the stem affect the tightening of the stem. However, they are only for headset adjustment.
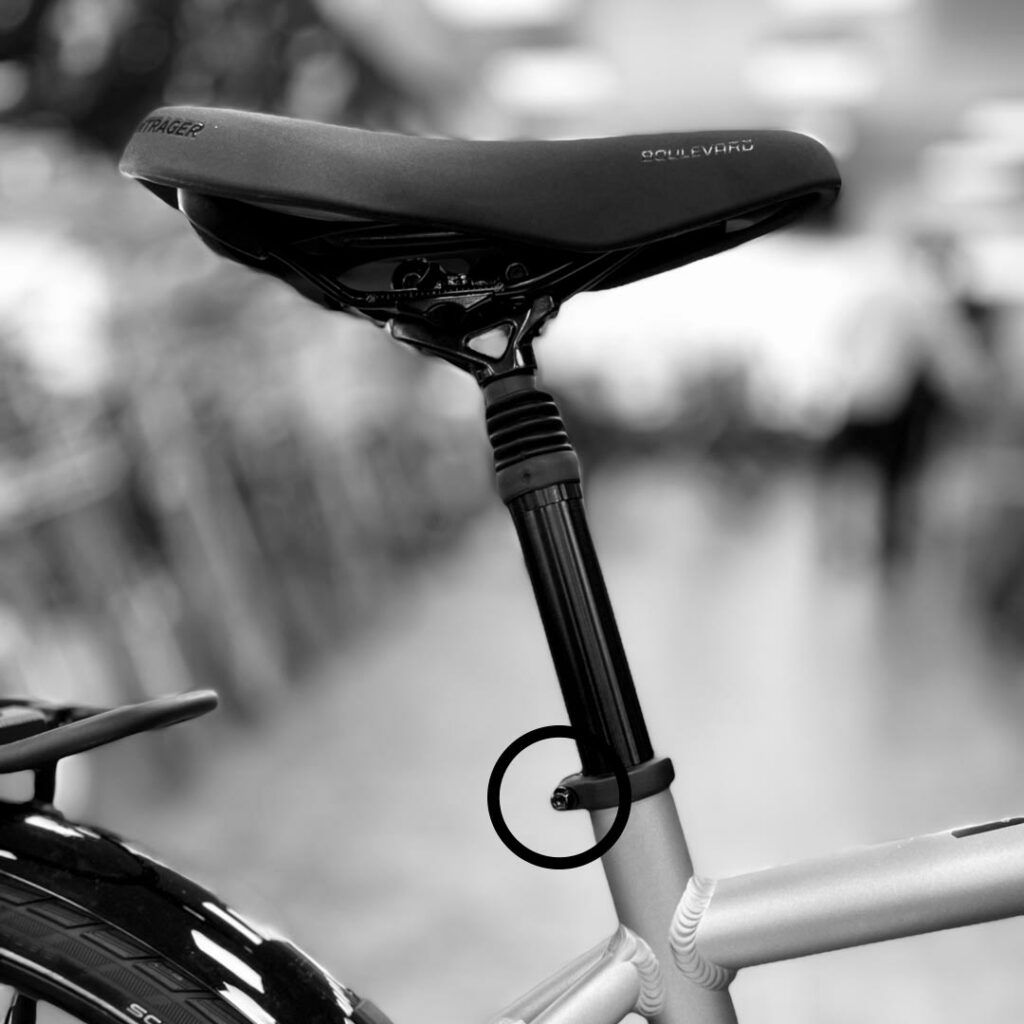
Saddle Height Adjustment
To adjust the saddle height, first loosen the seat post clamp bolt. Then slide the seat post to the desired height and tighten the bolt. In some cases, the seat post clamp has a quick-release lever. In this case, open the lever, adjust the saddle height, and close the lever.
Important Considerations
Never raise the seat post beyond the marked limit. The limit is indicated on the seat post shaft (Minimum insertion). A seat post raised too high may bend or, in the worst case, break. Also, pay attention to the tightness of the seat post clamp bolt and follow the values marked on the clamp. A clamp left too loose can cause the seat post to slip or rotate. Conversely, tightening too much puts stress on the structure of the clamping ring and may impede the smooth operation of, for example, a dropper post.
Correct saddle height
The optimal saddle height is somewhat individual, but by following this basic guideline, you’ll get off to a good start. Position yourself on the bike using a wall, door frame, or an assistant for support. Sit on the saddle and rotate the pedals so that one pedal is pointing straight down. Place your heel on the pedal. With your heel on the pedal, your leg should fully extend, but still reach the pedal. When you begin to ride normally, the ball of your foot will rest on the pedal, leaving your leg slightly bent in the lower position.
If the saddle is too low, you won’t be able to use the full power from your legs. On the other hand, if the saddle is too high, it may cause you to “stretch” for the pedal with each stroke, making it harder to maintain a smooth pedal rotation.


